Hi everyone! Welcome to my blog today.
I have a fun post to share today.. So excited to have been asked by Stampendous to create a project using their new Stack Art products!

Stampendous introduced Stack Art in January 2014. It's a terrific
product for a beginner crafter to the very advanced mixed media
artists. They're great for making tags, books,
jewelry etc. They are ATC sized and very easy to use and work with.
You can find the Stack Art Kits HERE,
In short they are kits that work together, there are several to choose
from and they are interchangeable.
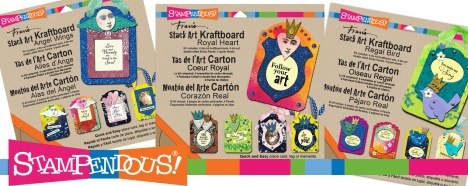
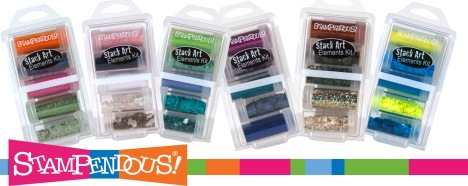
Stack Art Kits have three components:
- The Stack Art Kraftboard Kit which includes all the kraftboard pieces you’ll need to make at least 4 amazing creations; die cut, double-sided adhesive for all the kraftboard pieces; and sentiments you can use to make each piece a special gift or card embellishment.
- The Stack Art Stamp Sets which include an assortment of terrific background stamps and other images plus an acrylic handle.
- The Stack Art Elements Kits which each include five jars of embellishing goodness to stick to your adhesive covered kraftboard pieces.
All the co-originating elements have been selected for ya.... How enjoyable is that?
Here is my designed wooden picture frame that I embellished with Stampendous Stack Art.

Lets get started as I step you through the fun that I had designing and creating this altered wooden picture frame showcasing Stampendous Stack Art.
1. Gather up your suppplies

Lots of goodness with the Stack Art elements.
2. Here is a close up of the adhesive sheet that comes with the Kraft board pieces which sure does make it easy to add glitter and fragments.

3. Before you start the sprinkling process, be sure to think ahead of how you would like your design to look and here you can see, I had my bird decorated then adhered it to the chipboard piece which already had the adhesive sheet applied to the surface. Then sprinkle the fragments onto the chipboard and around the bird.


4. Gesso the wooden frame, dry, mist generously with water and then drop your liquid ink onto your frame and watch the magic happen. Love my Clearsnap mists and smooch sprays for this technique. I think this is one of my latest favorite techniques. Once you are happy with the blending of the colors, dab, direct the watercolor design with the heat tool and then let your inked surface rest and dry.


5. Once the frame is dry, bring out the stamp's that come with the kit and stamp up your frame. Add some rhinestones and another sprinkle of fragment flakes. I was trying to mirror the floral texture in the photo. So happy with this natural organic feel to this element.

6. Adhere you Stack Art element to the corner of your picture frame and place your photo into the frame.

As you can see here, I have paper quilled some peacock tail feathers and a head element on my feathered friend. I got out my Westcott Brand scissor and did trim up my chipboard bird to give the bird a peacock silhouette look prior to applying any glitter to the natural kraft chipboard.

Love how the stamps go so well with this designed ATC stack art.

One last look at my altered frame to show YOU what YOU can design with Stampendous Stack Art. Visit Stampendous and pick out one of the kit options that appeal to you and make some frames as gifts.

Thanks for stopping by my blog today.
Plan a creative day creating with Stampendous and you will be happy all week long.
Ava
Stampendous Supplies
Stack Art Kraftboard Regal Bird Kit
Stack Art Cling Rubber Stamps Regal Bird Kit
Stack Art Sumptuous Kit
Stack Art Cling Rubber Stamps Regal Bird Kit
Stack Art Sumptuous Kit
Other Supplies
Clearsnap, Smooch Spritz, Colorbox Spritzers
Zva Creative rhinestone
Westcott Brand Scissors
Tombow Adhesive
Heya Ava!! Thanks for the welcome into the card club!! Beautiful creation! That chunky glitter is to die for!!
ReplyDeleteOh sorry I came up as Anonymous! It's just me!!
ReplyDeleteSuch a beautiful project Ava! You have used those fabulous products to perfection!
ReplyDeleteBeautiful creation as always! Love the stampendous stack kits, excited to get my hands on them!
ReplyDeleteBeautiful work. Love all the detail. Stampendous always has the funniest stuff to play with. Thanks for sharing.
ReplyDeleteWow Ava. You have done it yet again! Your frame is gorgeous. The Stack Art is intriguing . I must try it.
ReplyDeleteBeautiful frame and love the amazing colours, along with the stamping! Such a gorgeous photo too! Thanks so much for all the encouragement and love that you leave for the projects over at BoBunny....I personally really appreciate it! x
ReplyDelete